반응형
Alert 구현방법
1. Alert 객체를 생성한다.
2. 액션을 생성한다.
3. 객체에 액션을추가한다.
4. 화면에 표현한다.
1. Alert 객체 생성
// 인스턴스 생성
        let alert = UIAlertController(title: "비밀번호 바꾸기", message: "비밀번호를 바꾸시겠습니까.", preferredStyle: .alert)
title 에는 제목 message 에는 메세지를 적어서 생성한다.
preferredStyle
.alert : 중앙에 창을 띄워준다.
.actionSheet : 밑에서 창을 띄워준다.
2. 액션 생성
     // 액션 생성
    let sucess = UIAlertAction(title: "확인", style: .default){ action in
        print("확인 버튼이 눌렸습니다.")
    }
    let sucess2 = UIAlertAction(title: "확인2", style: .destructive){ action in
            print("확인 버튼이 눌렸습니다.")
        }
    let cancel = UIAlertAction(title: "취소", style: .cancel){ cancel in
        print("취소 버튼이 눌렸습니다.")
    }
alert에서 사용할 액션들을 생성한다.
style
.default : 기본 형태
.destructive : 빨간색 글씨로 강조
.cancel : 취소 형태 (actionSheet 에선 밑에 따로 표시)
3. 객체에 액션 추가
// 액션추가
alert.addAction(sucess)
alert.addAction(cancel)
alert.addAction(sucess2)
생성해두었던 객체에 액션을 추가한다.
2와 3의 과정을 액션을 생성하면서 바로 추가 하여 사용 할 수 있다.
alert.addAction(UIAlertAction(title: "확인", style: .default, handler:{ _ in
            print("확인 버튼이 눌렸습니다.")
        }))
alert.addAction(UIAlertAction(title: "확인2", style: .destructive, handler: { _ in
			print("확인 버튼이 눌렸습니다.")
        }))
alert.addAction(UIAlertAction(title: "취소", style: .cancel, handler: { _ in
			print("취소 버튼이 눌렸습니다.")
        }))
4. 화면에 표현
//화면에 표현
present(alert, animated: true)
반응형
전체코드
// 인스턴스 생성
let alert = UIAlertController(title: "비밀번호 바꾸기", message: "비밀번호를 바꾸시겠습니까.", preferredStyle: .actionSheet)
// 액션 생성
let sucess = UIAlertAction(title: "확인", style: .default){ action in
print("확인 버튼이 눌렸습니다.")
}
let sucess2 = UIAlertAction(title: "확인2", style: .destructive){ action in
print("확인 버튼이 눌렸습니다.")
}
let cancel = UIAlertAction(title: "취소", style: .cancel){ cancel in
print("취소 버튼이 눌렸습니다.")
}
// 객체에 액션 추가
// alert.addAction(UIAlertAction(title: "확인", style: .default, handler:{ _ in
// print("확인 버튼이 눌렸습니다.")
// }))
// alert.addAction(UIAlertAction(title: "취소", style: .cancel, handler: { _ in
// print("취소 버튼이 눌렸습니다.")
// }))
alert.addAction(sucess)
alert.addAction(sucess2)
alert.addAction(cancel)
//화면에 표현
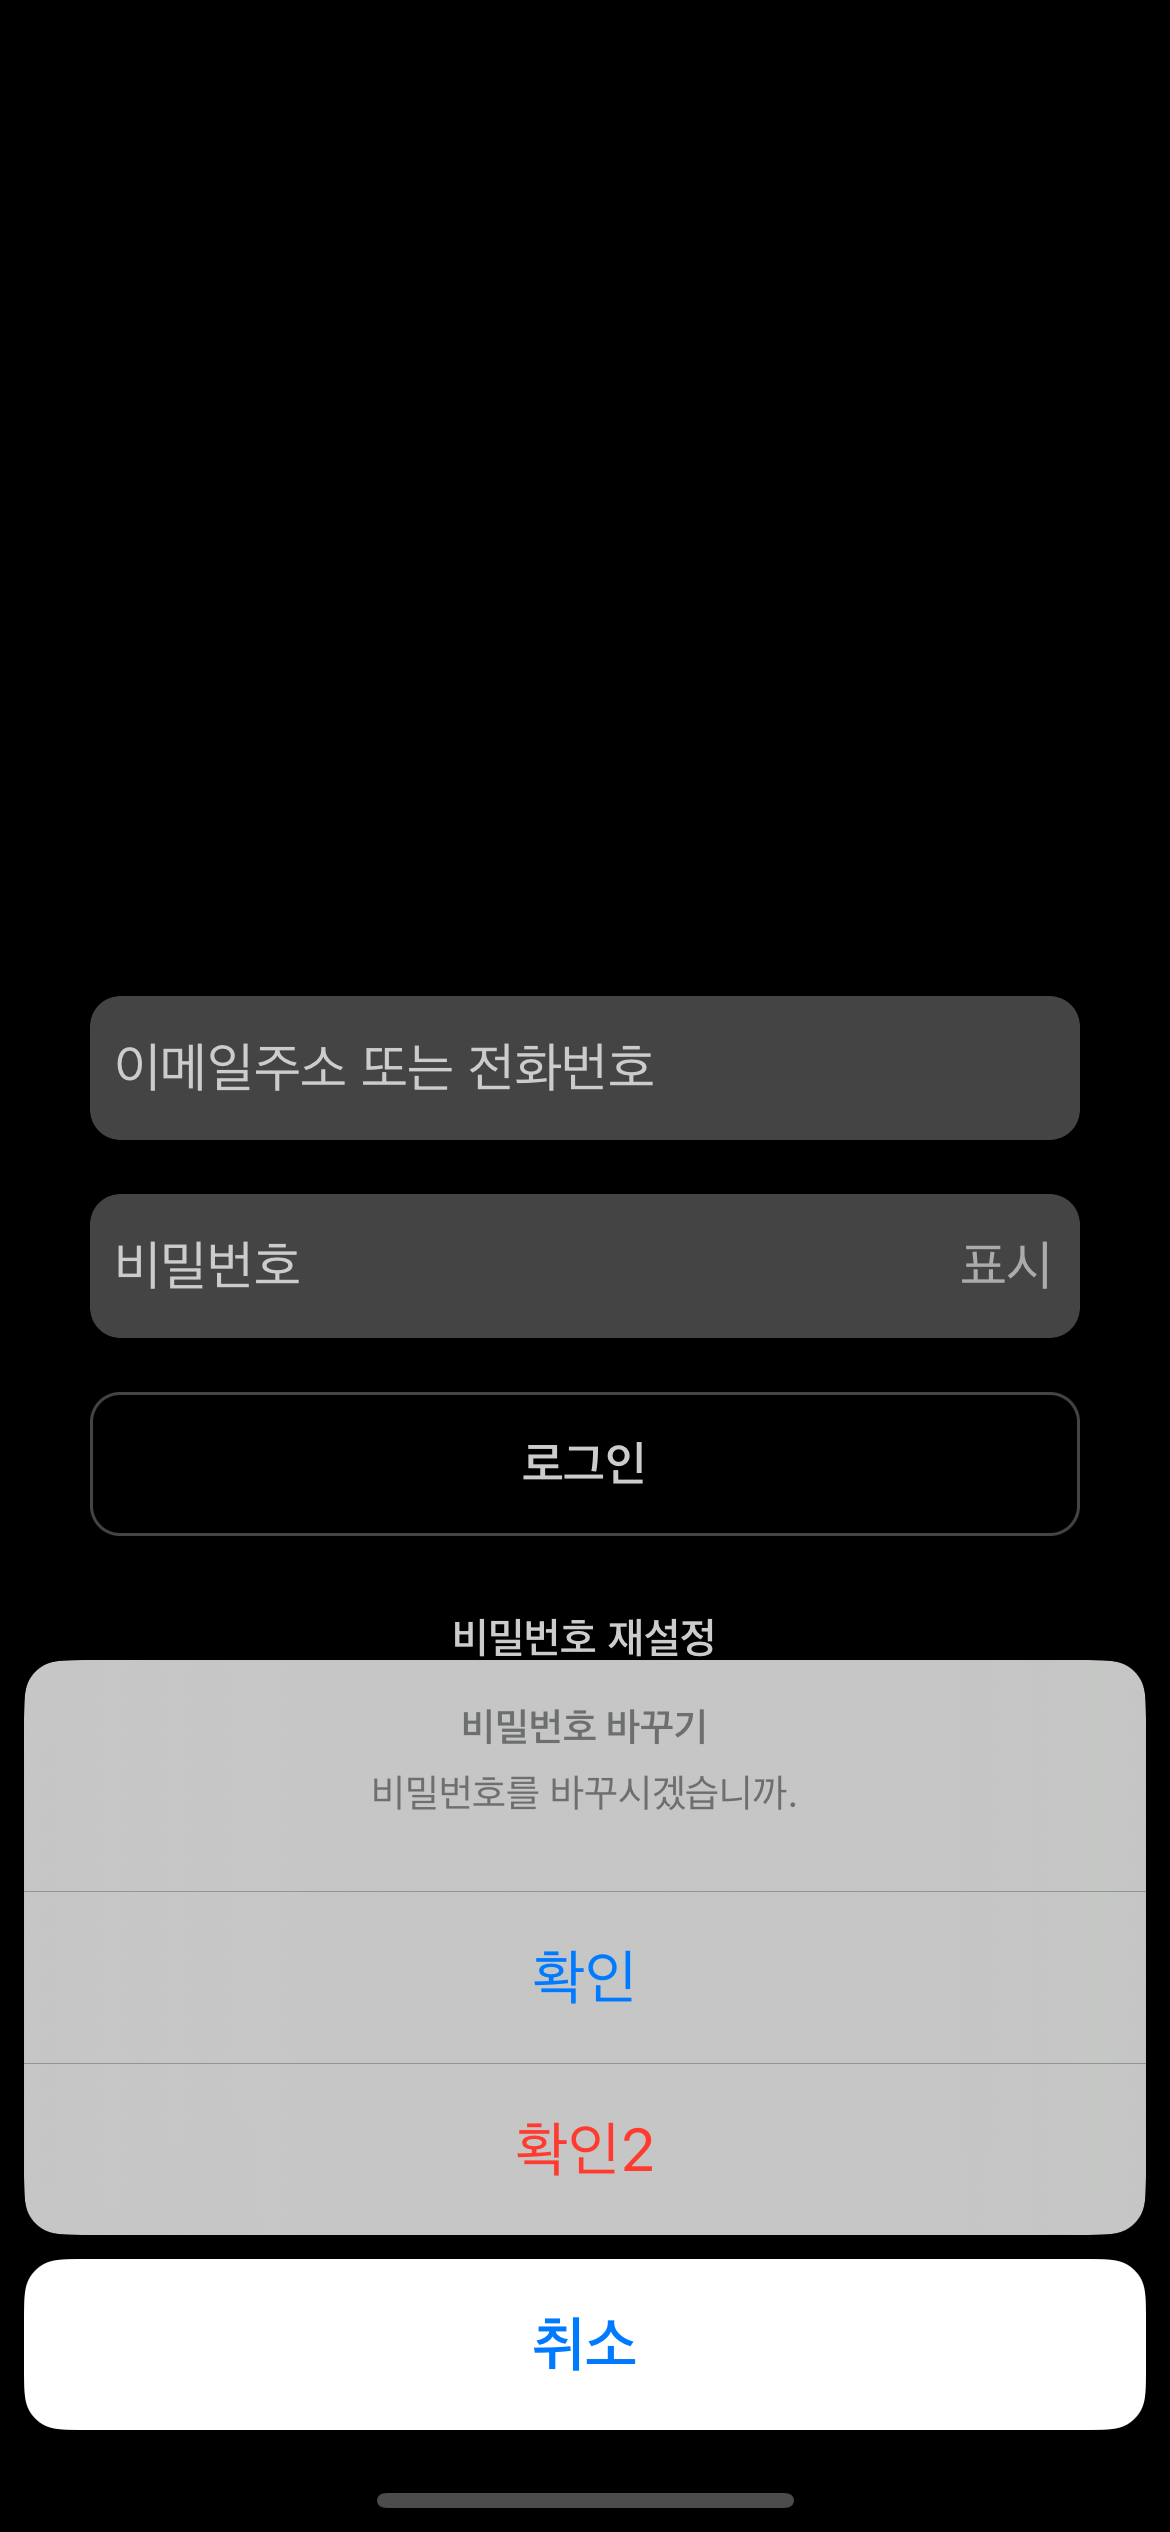
present(alert, animated: true)실행 화면
preferredStyle
.alert : 중앙에 창을 띄워준다.
.actionSheet : 밑에서 창을 띄워준다.
style
.default : 기본 형태
.destructive : 빨간색 글씨로 강조
.cancel : 취소 형태 (actionSheet 에선 밑에 따로 표시)

Alert 활용하기
https://sangnam2.tistory.com/entry/Swift여러번-호출되는-Alert-경고창-활용
Swift)여러번 호출되는 Alert 경고창 활용
여러 곳에서 alert를 호출하다 보면 같은 코드가 반복된다. 간단하게 줄여보자. 함수 선언 UIViewController에서 호출 하기 위해 확장을 통해 함수를 선언 해줍니다. addButtonText 를 넣어주지 않으면 취
sangnam2.tistory.com
반응형
'iOS > UIKit' 카테고리의 다른 글
| Swift) UIColor(RandomColor), 랜덤 컬러 뽑기 (0) | 2023.07.25 |
|---|---|
| UITextField(Editing Did End , Editing Did End On Exit) 이벤트 (0) | 2023.07.19 |
| iOS) 네비게이션 컨트롤러 (0) | 2023.05.15 |
| iOS) 스토리보드 라벨 텍스트 멀티라인 설정 (0) | 2023.05.11 |
| iOS) swift 테두리, UIView 모서리 둥글게 만들기 (0) | 2023.03.30 |